Adding products via Shopify
If you already have a Shopify store, this is the fastest way to get your products on Weebe. Connect your store once and your catalogue syncs automatically — products, variants, inventory, images, and meta fields stay up to date.
Overview
The Shopify connector uses a New Custom App created in your Shopify Dev Dashboard. This gives Weebe a secure, scoped connection to your store — no third-party OAuth, no shared passwords.
The setup has six steps:
- Create a custom app in your Shopify Dev Dashboard
- Note the Redirect URLs from your Weebe seller panel
- Configure the app's URLs, scopes, and Redirect URLs in Shopify — then release it
- Copy your credentials from Shopify Dev Dashboard Settings
- Enter credentials in Weebe and install
- Import your products
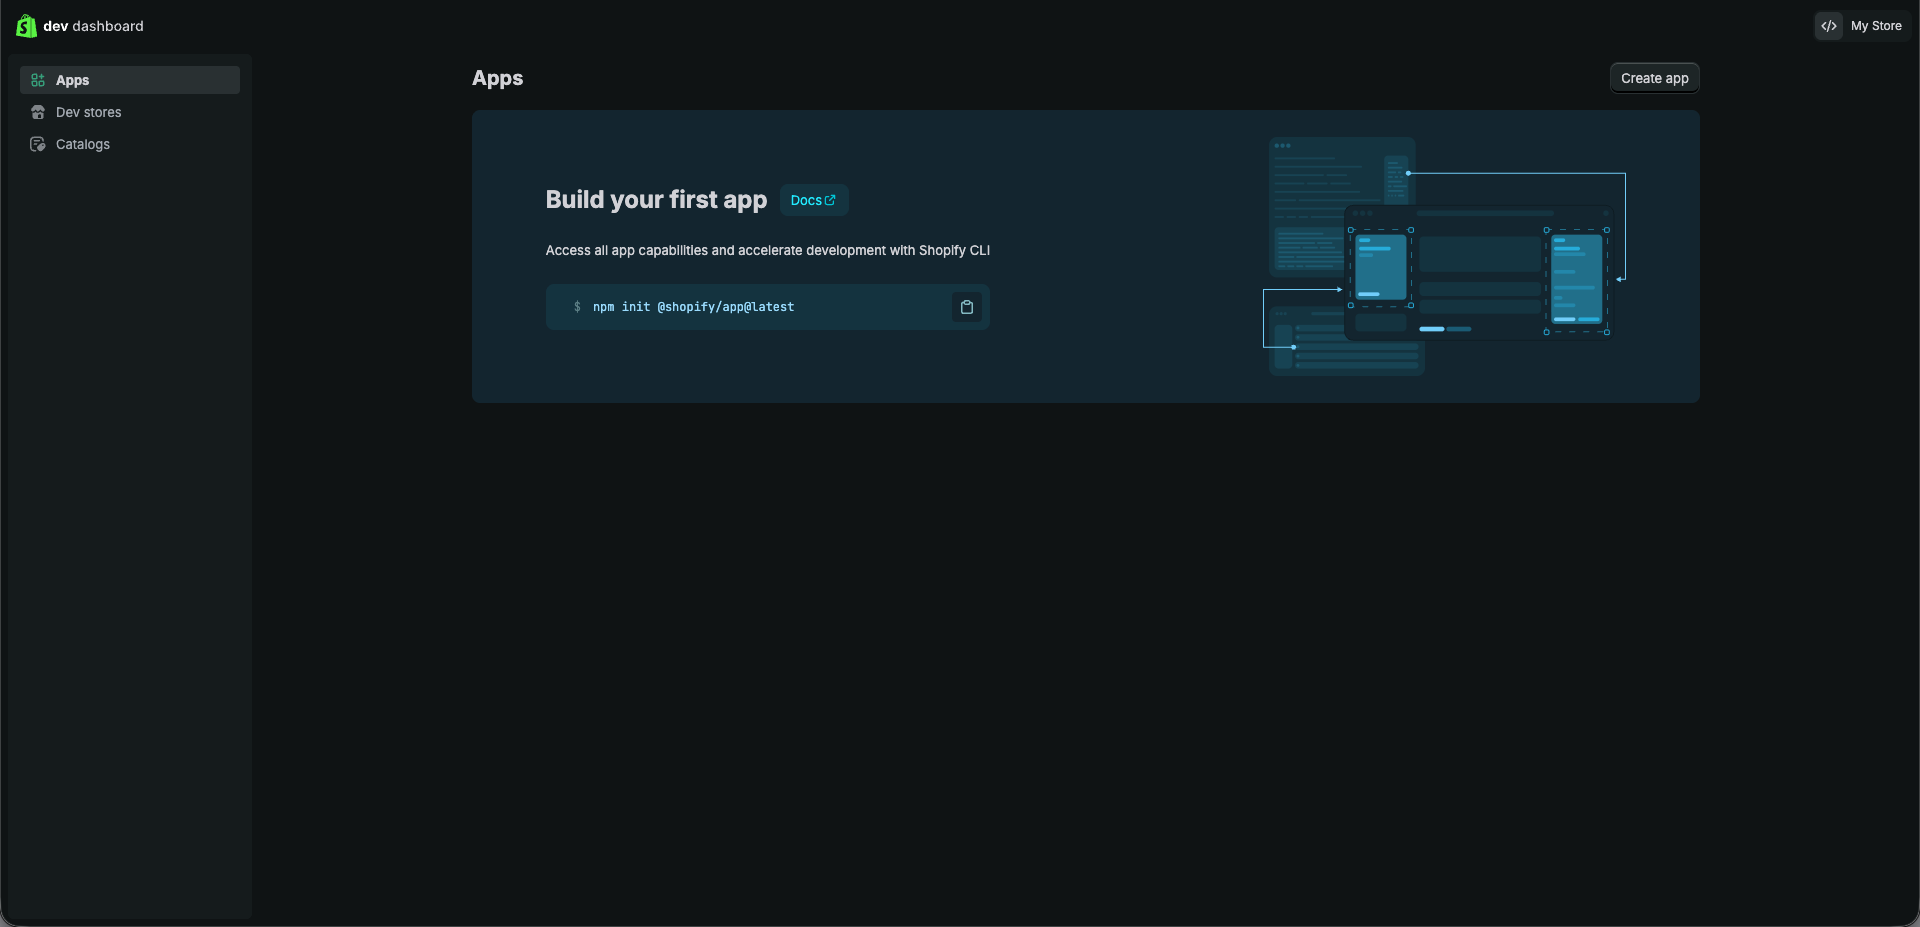
Step 1 — Create a custom app in Shopify
- Go to dev.shopify.com and log in with your Shopify account
- Click Apps in the left sidebar
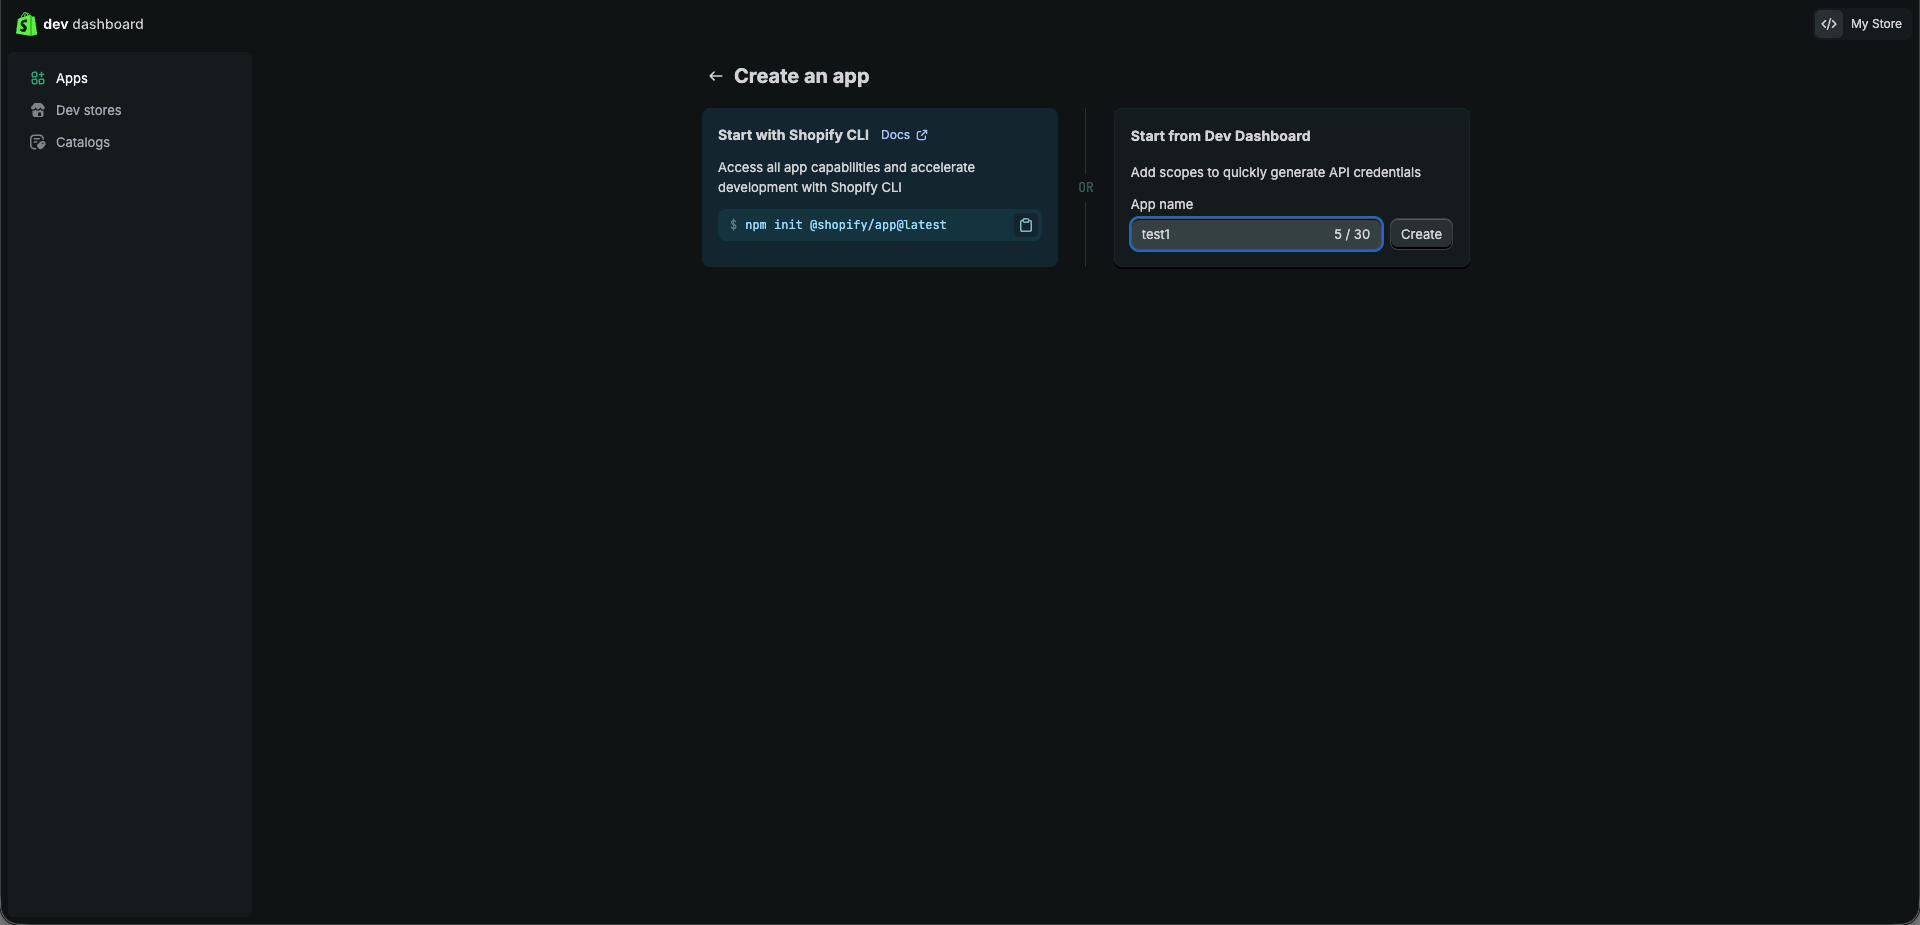
- Click Create app in the top-right corner
- Enter any name for the app (e.g.
Weebe Connector) and click Create
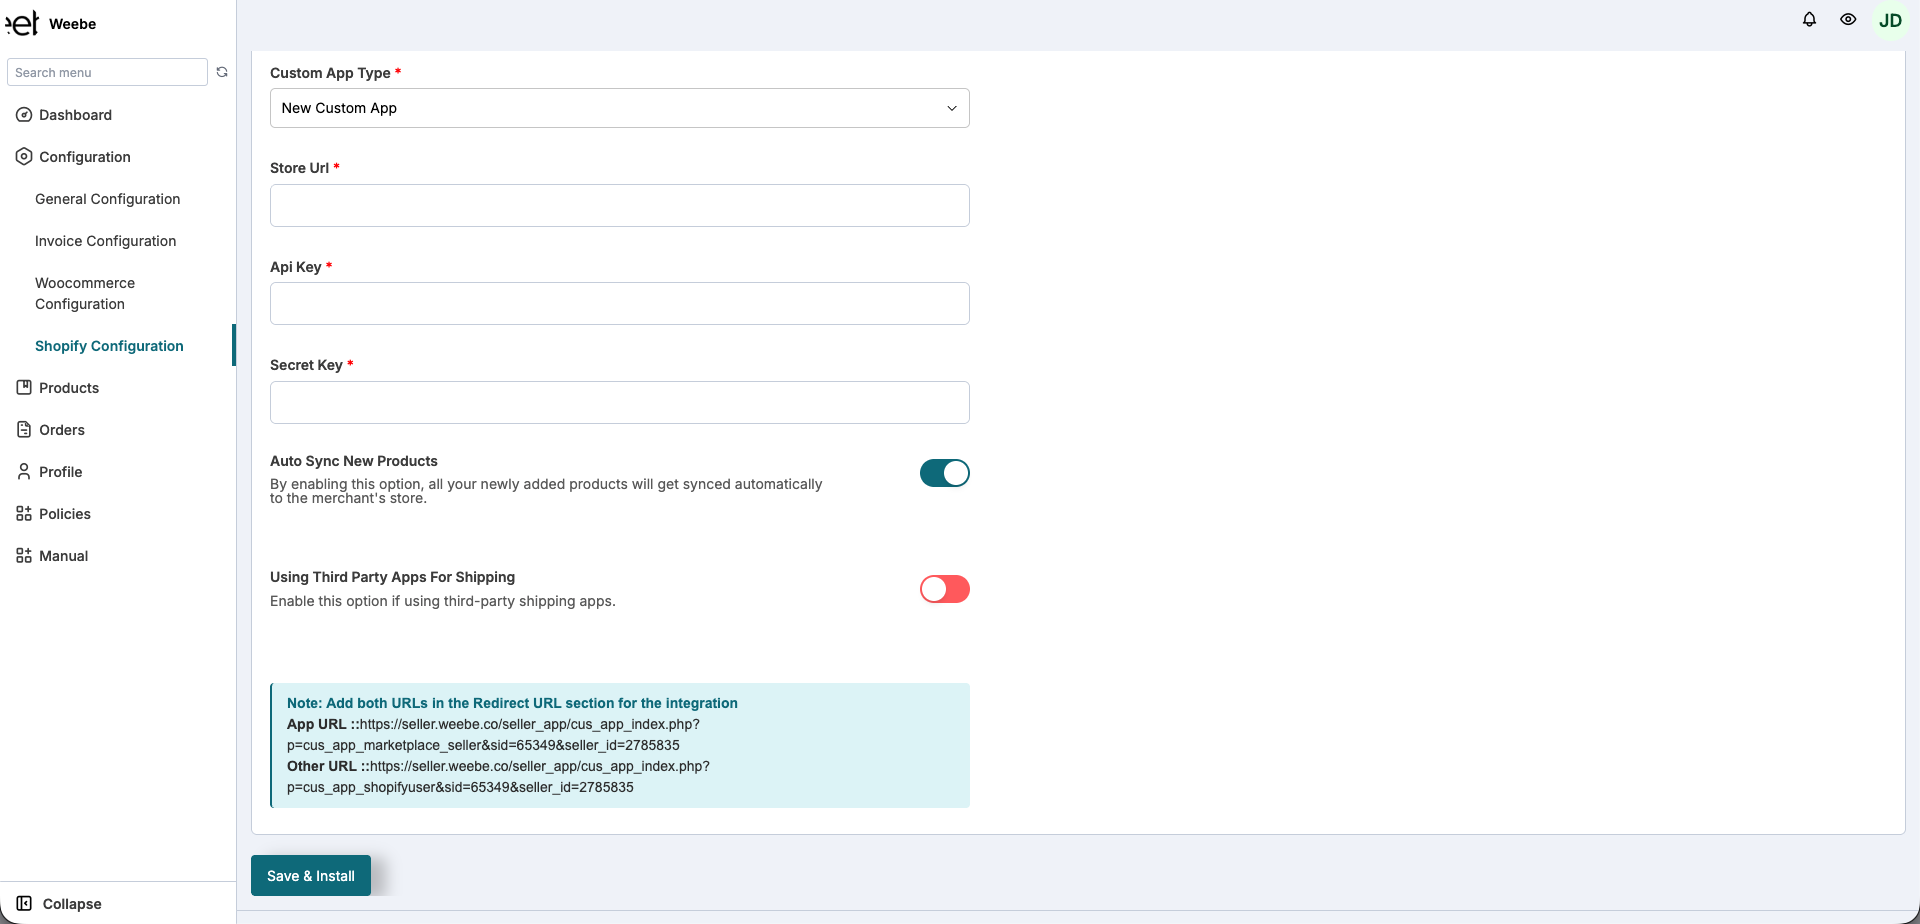
Step 2 — Get your Redirect URLs from Weebe
Before configuring the app in Shopify, you need the Redirect URLs that Weebe provides for your account.
- Log in to seller.weebe.co
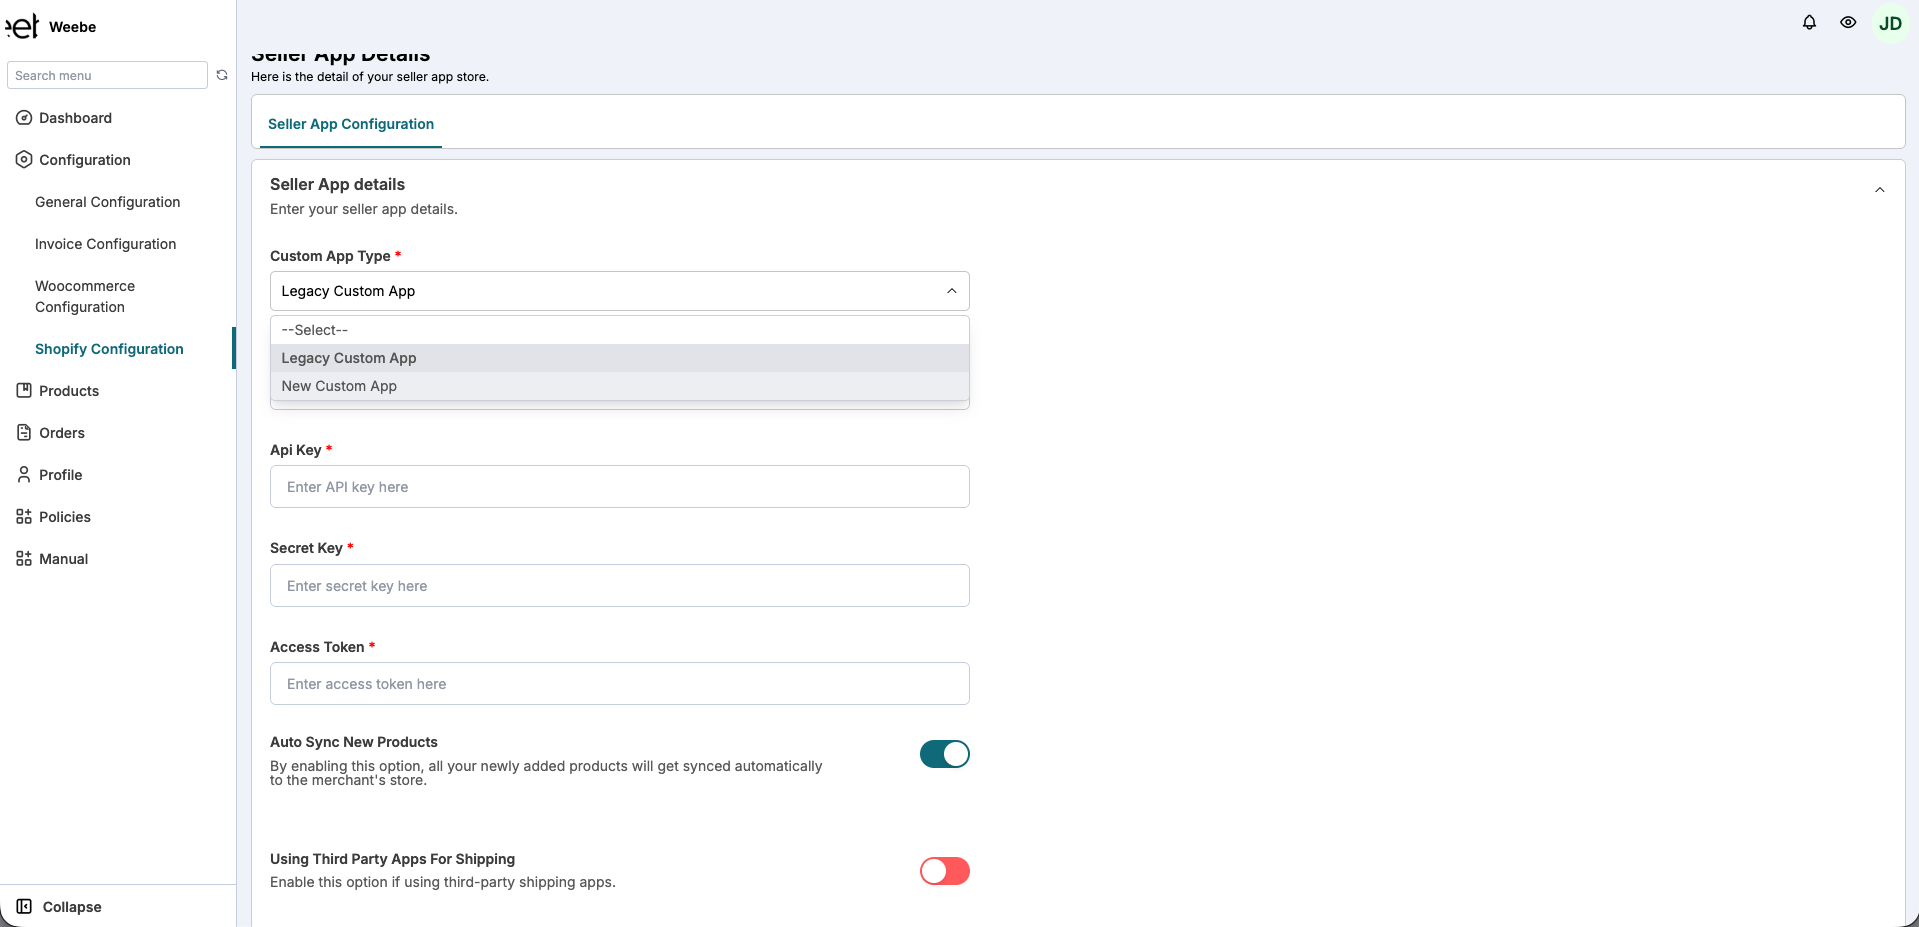
- Go to Configuration → Shopify Configuration
- Under Custom App Type, select New Custom App
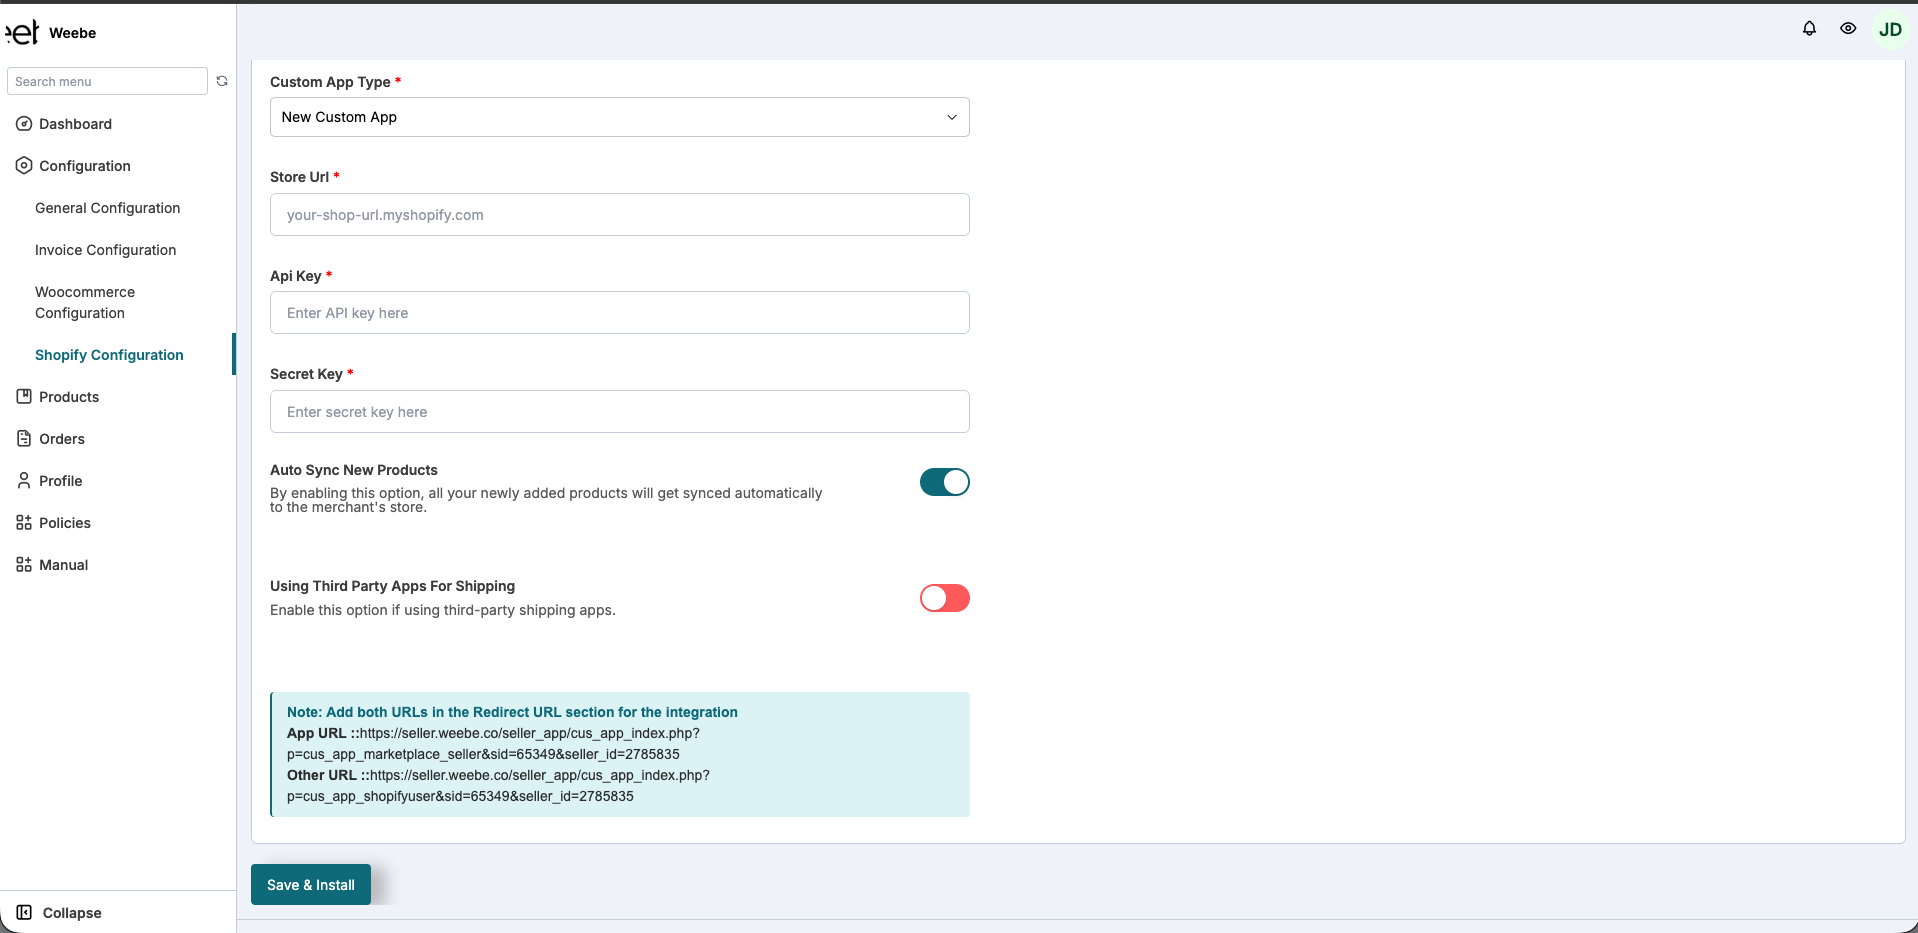
- Note the two URLs shown in the blue info box — you'll need these in the next step:
- App URL — used as the Shopify app's App URL
- Other URL — the second redirect URL
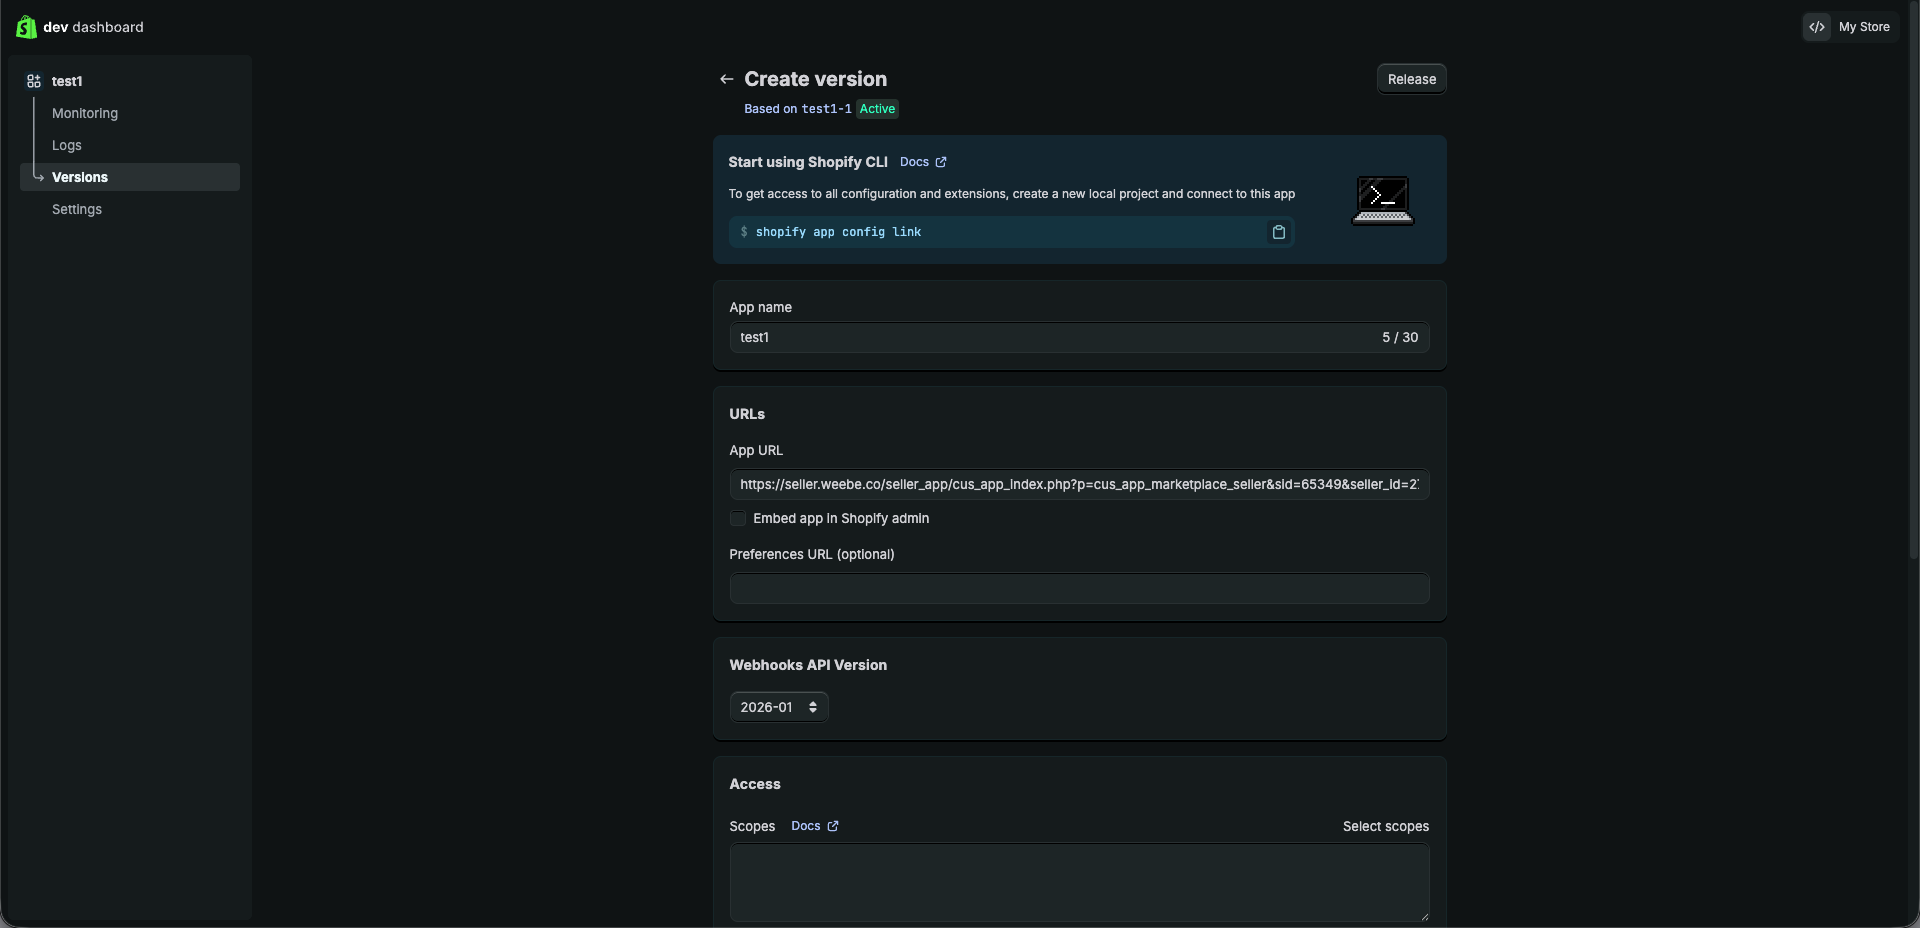
Step 3 — Configure the app version in Shopify
- Back in the Shopify Dev Dashboard, open your app and click Versions in the left sidebar
- Click Create version
- In the URLs section, paste the App URL from Weebe into the App URL field
- Scroll down to the Access section. In the Scopes field, paste the following comma-separated list:
write_assigned_fulfillment_orders,read_assigned_fulfillment_orders,read_fulfillments,write_fulfillments,read_inventory,write_inventory,read_locations,read_orders,write_orders,read_products,write_products,read_markets_home,read_customers,write_customers
- In the Redirect URLs field, paste both URLs from Weebe as a comma-separated list
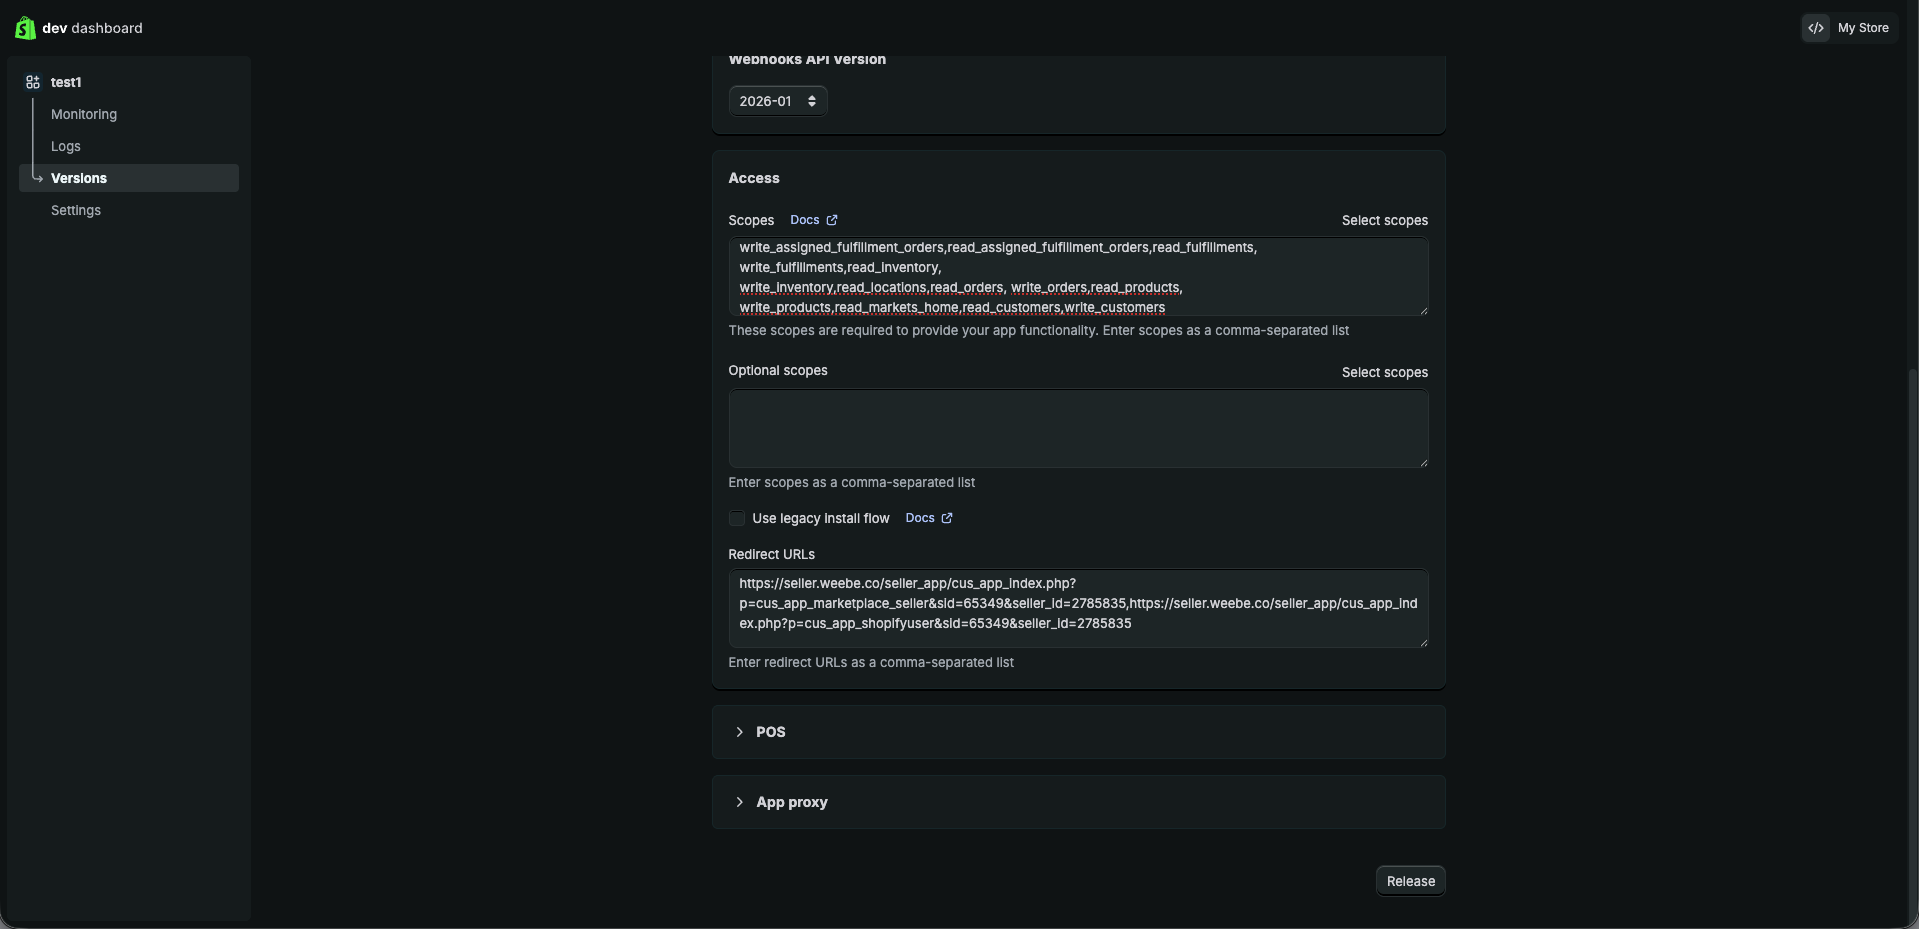
- Click Release at the bottom of the page, then confirm in the dialog that appears
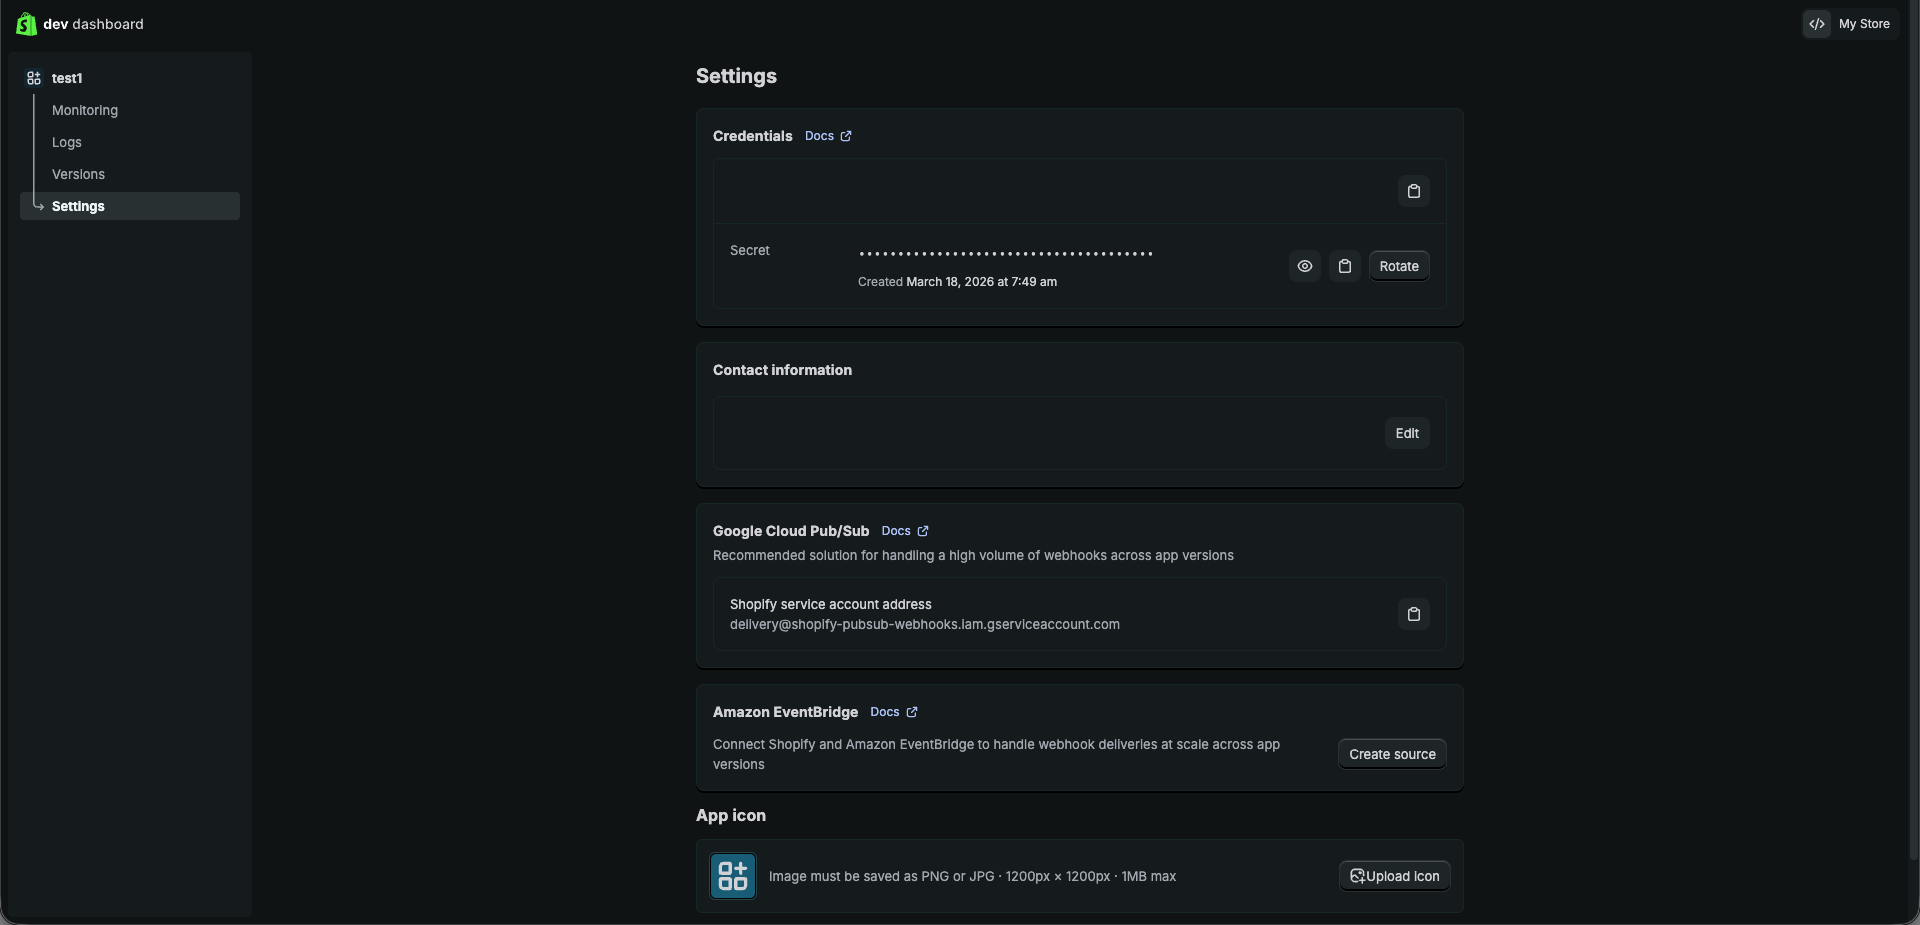
Step 4 — Copy your credentials from Shopify
- In your app's left sidebar, click Settings
- Under Credentials, copy your Client ID and Secret
The Secret is shown on this page and can be rotated, but store it somewhere secure before navigating away.
Step 5 — Enter credentials in Weebe and install
- Back in Weebe, on the Shopify Configuration page, fill in:
- Store URL — your Shopify store URL in
your-store.myshopify.comformat - Api Key — paste your Shopify Client ID
- Secret Key — paste your Shopify Secret
- Store URL — your Shopify store URL in
- Optionally enable Auto Sync New Products — when on, new products added to Shopify sync to Weebe automatically
- Click Save & Install
- You'll be redirected to your Shopify store to approve the app installation — click Install
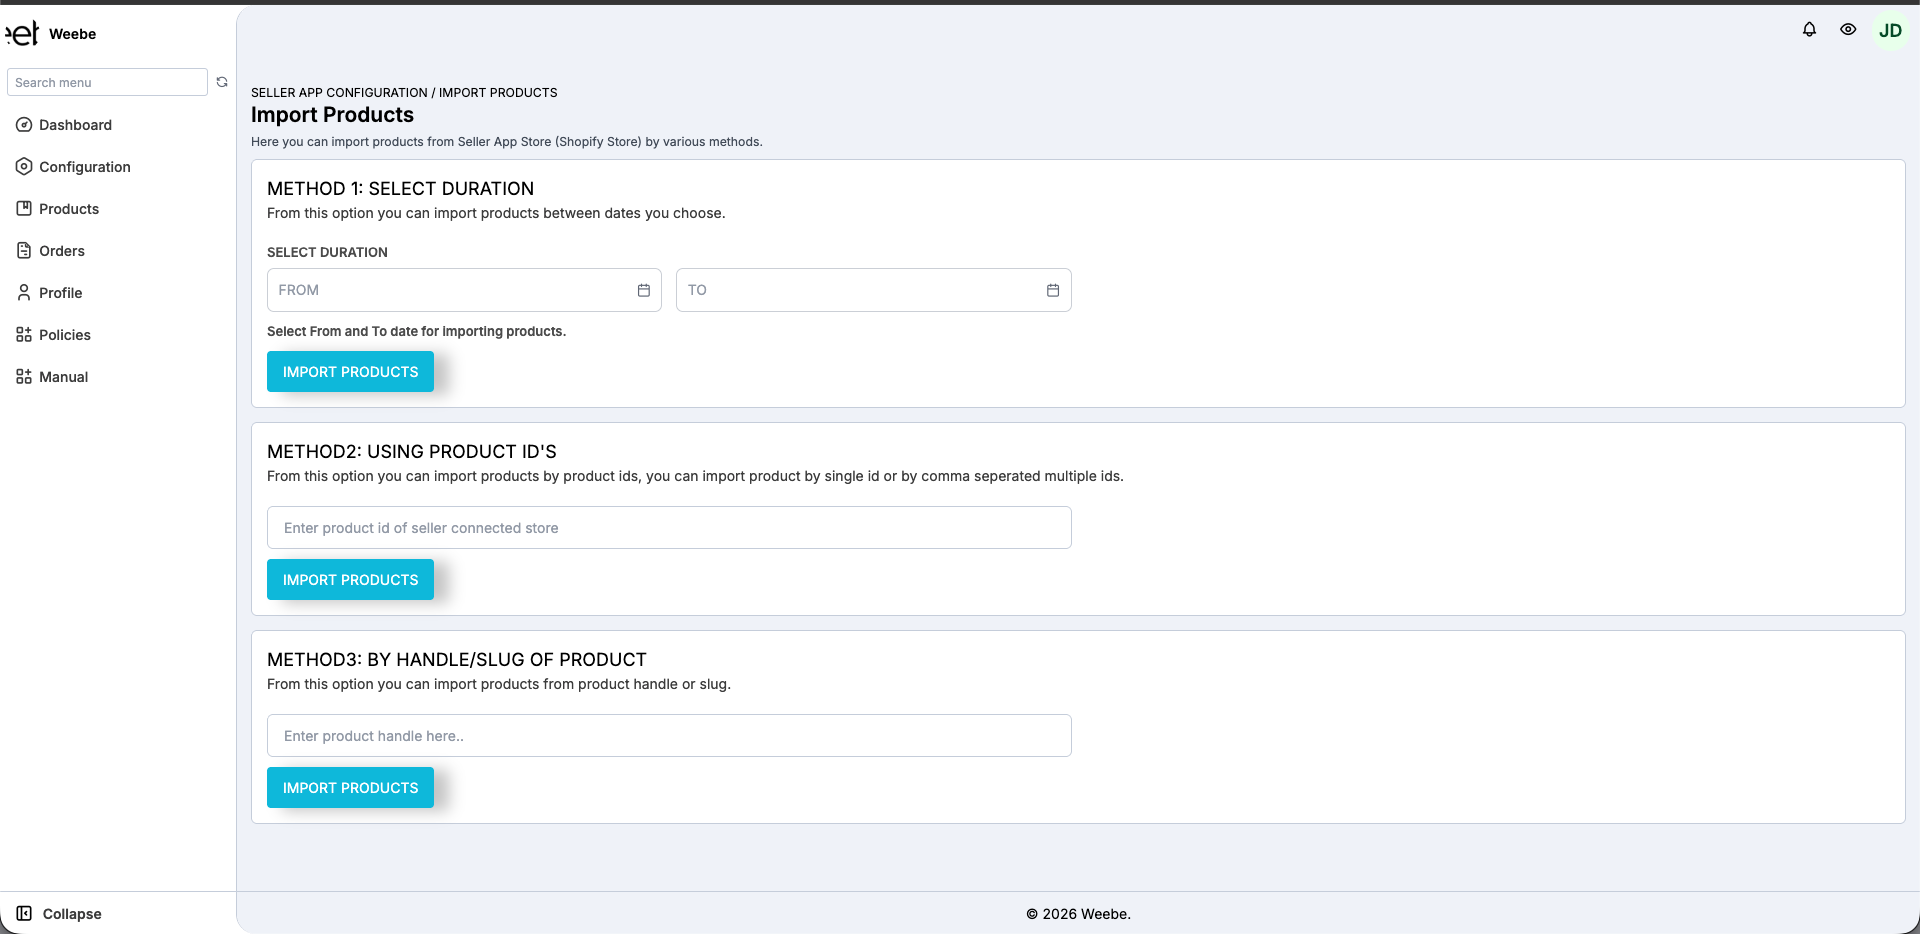
Step 6 — Import your products
After installation, you'll return to the Seller App Details page. Click IMPORT PRODUCTS in the top-right corner.
Choose one of three methods:
| Method | How to use |
|---|---|
| Method 1: Select Duration | Import all products created or updated between two dates |
| Method 2: Using Product ID's | Import specific products by Shopify ID — enter a single ID or comma-separated list |
| Method 3: By Handle/Slug | Import a single product by its Shopify handle |
Click IMPORT PRODUCTS under the method you want. A success notification confirms that products are importing in the background.
Imported products go through the Weebe approval process before going live. See Managing Products for approval statuses.
What gets synced
Once connected, the following data syncs from your Shopify store to Weebe:
| Data | Notes |
|---|---|
| Products & variants | All active products including all variants |
| Collections | Both manual and smart collections |
| Inventory | Quantities and tracking status |
| Images | Up to the limit set by Weebe (between 1–20 images per product) |
| Product meta fields | Custom meta fields are imported automatically |
| Pricing | Compare At Price shown as original (crossed-out), Price as selling price |
Sync Rules
| Shopify Status | Weebe Behaviour |
|---|---|
| Active | Imported and submitted for approval |
| Draft | Not synced |
| Archived | Removed from Weebe |
Out of stock (qty = 0) | Hidden from buyers |
Tips
- Enable Auto Sync New Products to keep your catalogue current — new products added in Shopify will sync to Weebe automatically
- Use the Collection Mapping tab in Seller App Configuration to map Shopify collections to Weebe categories
- Changes in Shopify reflect on Weebe within a few minutes via webhook
- To reconnect or update credentials, return to Configuration → Shopify Configuration
Troubleshooting
Products not appearing after import?
- Check the product is Active (not Draft or Archived) in Shopify
- Allow up to 5 minutes for the initial sync to process
- Try re-importing using a specific product ID (Method 2) to confirm the connection is working
App install failed or redirected with an error?
- Make sure the Redirect URLs in your Shopify app version match exactly what Weebe shows in the blue info box
- Try clicking Save & Install again from Configuration → Shopify Configuration
Price mismatch?
- Weebe uses the Shopify Compare At Price as the original (crossed-out) price and Price as the selling price
Further Reading
For full technical documentation on the Seller Shopify Store Connector, refer to the official Webkul guide: Seller Shopify Store Connector — Webkul Documentation